Tuesday, 11 December 2012

Panda Bread

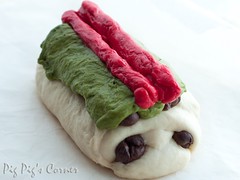
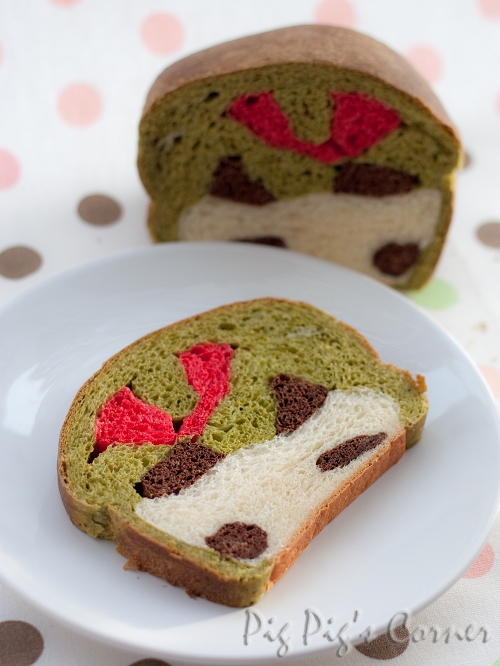
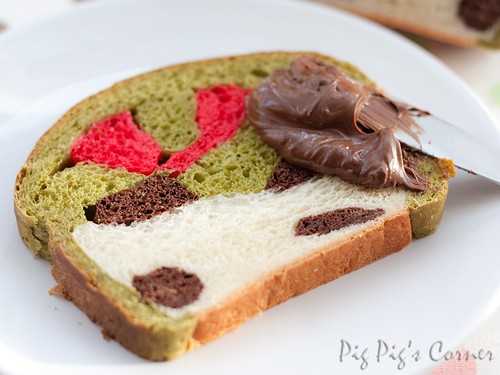
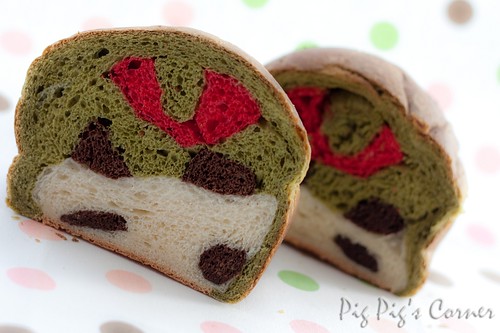
Sorry for my lack of activity and visits for the past few days. My in-laws are here and we have been traveling around a lot. We will be heading to Cornwall next week, so here's my last recipe before I leave - a really cute and delicious Panda bread! Saw this over at Not quite Nigella and couldn't resist baking this. The red blobs on top were supposed to form a heart shape, but due to my lack of such skills, it looks like a floating ugly ribbon.

panda bread 16


Panda Bread

Printable recipe
By Pig Pig's Corner

Prep time: 3 hrs 
Cook time: 30 mins 
Yield: 9 x 4" loaf


Ingredients:
  • 210g 1 egg yolk + rice milk (i.e. use 1 egg plus enough rice milk to make up to 210 g)
  • 230g bread flour
  • 70g cake flour
  • 30g caster sugar
  • 4.5g salt
  • 1 packet (7g) instant yeast
  • 18g unsalted butter - softened at room temperature
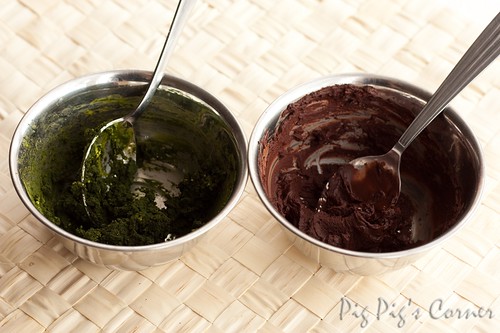
  • 8g green tea powder - dissolved in 10g boiling water
  • 8g cocoa powder - dissolved in 8g boiling water
  • A few drops of red colouring

Directions:

  • In a microwave-safe bowl, lightly beat together the yolk and milk. Microwave for 30 sec.
  • In a clean mixing bowl, put in flour, sugar, salt, yeast. Mix to combine.
  • Add milk and egg mixture and butter to dry mixture.
  • Using and electric mixer with a dough hook attached, knead until elastic. The dough was a bit sticky, so I added about 1/2 tbs each of bread flour and cake flour to make it less sticky. I left it to knead for about 20 mins.
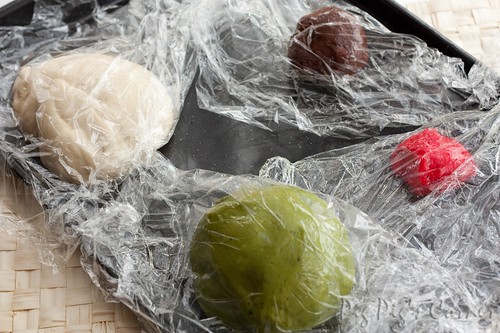
  • Divide dough (about 560g) into 3 parts: 60g for chocolate, 185g for plain white, 25g for red, the rest (about 290g) for green
panda bread 01
  • Add chocolate paste to 60g dough and knead until well combined.
  • Add red colouring to 25g dough and knead until well combined.
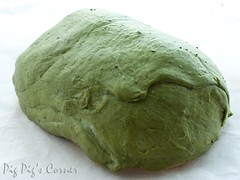
  • Add green tea paste to 290g dough and knead until well combined.
  • Loosely wrap each dough in cling film, prove for 40 mins.
panda bread 02
  • Knead/ fold each dough a few times to re-distribute the air. Prove for another 30 mins.
To shape & assemble:
panda bread 03panda bread 04
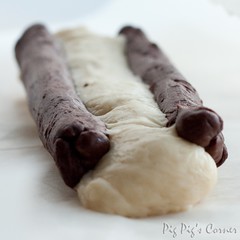
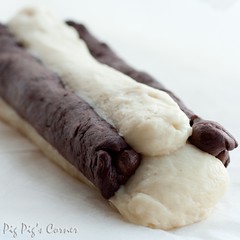
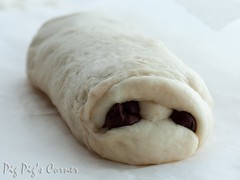
1. Shape 70g of plain dough for the face and 2 pieces of 20g chocolate dough for the eyes.Shape to 5.5-6 inches in length.2. Fill the gap in between the eyes with 20g plain dough.
panda bread 05panda bread 06
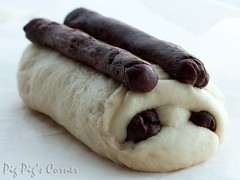
3. Roll out and place the remaining plain dough over the shaped dough.4. Divide the remaining chocoate dough into 2 pieces for the ears.

panda bread 07panda bread 08
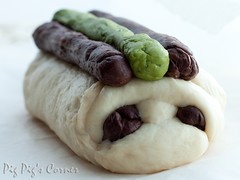
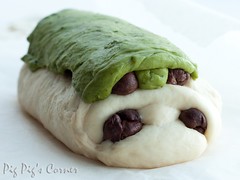
5. Use 20g of green tea dough to fill up the gap in between the ears.6. Use 40g of green tea dough to cover the ears.

panda bread 09panda bread 10
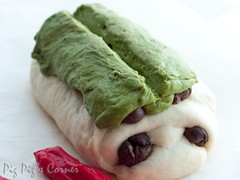
7. Make a slit on the top green tea dough.8. For the heart shape, shape the red dough into a cylinder shape. Cut into 2 lengthwise. Place these 2 in the slit. Leaving a little gap in between the dough.

panda bread 11panda bread 12
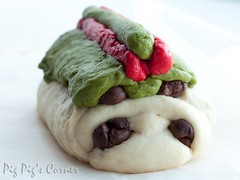
9. Fill in the gap with 15g of green dough.10. Roll out and wrap the rest of the green tea dough all around the patterned dough. Leave the bottom unwrapped.

panda bread 13panda bread 14
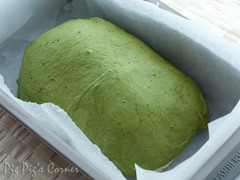
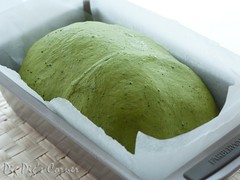
11. Place dough in a lined loaf pan.12. Cover with cling film. Let prove for about 60 mins in an enclosed area (i.e. microwave/ oven). I placed it in a microwave together with a cup of hot water.
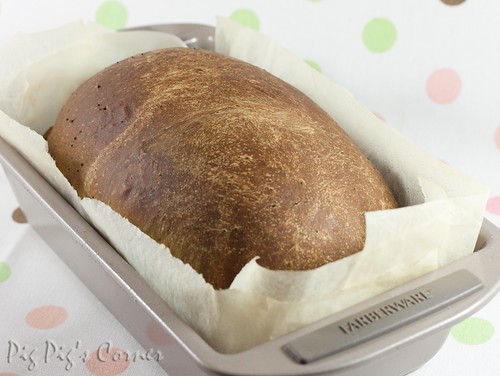
  • Bake at 200℃ for 25-30 mins.
panda bread 15
  • Slice and enjoy!
panda bread 17
  • Delicious with Nutella!
panda bread 18

Chill, Baby! Make Blueberry Cheesecake Popsicles


When the sun is shining and your guests are feelin’ the heat, a cookie, cake or pie are nice but… they simply won’t do it like a homemade frozen treat. And popsicles are way easier (and healthier) to make than ice cream. Find a blender, some molds, your favorite fruit and you’re on your way to making kids giggle and grown-ups feel like kids. (Though if you want the grown-ups to feel like grown-ups, check back next week for recipes for boozy pops).
Popsicles were “invented” by Frank Epperson, when he accidentally left a cup of soda with a stir stick sitting outside on a cold night. He called it the “Eppsicle.” While Frank’s kids preferred referring to their pop’s invention with his name in the title, Frank patented the (way more charming) term “popsicle” in 1923. Nine decades later, we’ve learned a thing or two about making them great. You can, obviously, freeze any drink or puree into a popsicle, but here are some tips to making them more refreshing and delicious than ever.
Picking the Ingredients
From orange juice to chocolate pudding, you can make popsicles out of anything that will freeze. Especially during the summer months, though, the very best base for a popsicle is in-season fruit, pureed in a blender or food processor.  You can jazz up the puree by incorporating ingredients to taste like yogurt, juice, fresh herbs, spices, coconut milk, milk, cream, or—why not?—pudding.  My standard, minimalist, all-fruit, no-dairy popsicle recipe is as follows: Puree 4 cups of diced fruit. Mix with ½ cup of simple syrup and 3 tablespoons of citrus juice (lemon, lime or orange, depending on how much tartness or sweetness the fruit needs).
Sticking with an in-season fruit is one of the keys to sending the flavor of your popsicles into another universe. If you’re buying from a farmer’s market, ask the farmer for her bruised, ugly selection (at a discount!) since blended fruit needn’t be beautiful. Bonus: usually that fruit is the ripest.
Sweeten with Simple Syrup
Simple syrup is my favorite ingredient for sweetening pops since it blends into your mixture easily and evenly. To make 1½ cups of simple syrup, combine 1 cup of sugar and 1 cup of water in a medium saucepan. Bring to a boil, then cool. This stuff will last for eons in your refrigerator and is perfect to have on hand for sweetening iced coffee. Remember that the amount of sugar will vary from fruit to fruit, so always taste your puree and adjust to taste before freezing.
Tart it Up
A natural acid like fresh lemon, lime or orange juice adds a bright, nuanced dimension to popsicles, especially if you’re using very sweet fruit. Since cold tends to numb the tongue a bit, tartness helps to “wake” it up. Lemon juice is the perfect match for any berry while lime juice does wonders to cherries and tropical fruits. Or use a mild vinegar: My favorite thing to do is swirl in a teaspoon of balsamic vinegar into pureed strawberries.
Molds and Sticks
You can find popsicle molds at most housewares stores and wooden sticks at craft stores, but official gear isn’t strictly necessary. The end result isn’t as glamorous, but Dixie cups or ice cube trays stuck with plastic spoons or chopsticks get the job done. Remember, it’s easier to unmold the popsicles if the mold tapers a bit toward the tip.
Unmolding, Storing and Serving
Make sure your pops are frozen throughout—it will take at least 6 hours in your freezer. To unmold, dip the mold in a bowl of hot water or hold under hot running water from the faucet for 10 seconds. Immediately put in a plastic sandwich bag (the simple ones, sans ziplock) or wrap in plastic wrap, and store in your freezer for up to a week.
To serve, fill a big, beautiful bowl with ice and stick the popsicles into the ice with the stick poking out for easy grabbing. Put the bowl in the middle of your dinner table, or walk around and pass your popsicles to your guests.
Blueberry-Lemon Cheesecake Pops
Juicy cherries, sweet strawberries or tangy pineapple are also delicious instead of blueberries for this cheesecake-inspired recipe.
Makes eight 3½ ounce popsicles
4 ounces mascarpone cheese
½ cup plain yogurt
Zest from 1 lemon
¼ cup milk
2 cups blueberries
2 tablespoons fresh lemon juice
3 tablespoons simple syrup
1 cup crushed graham crackers
Equipment:
3½ ounce popsicle molds
Wooden popsicle sticks
Combine dairy: In a medium bowl, vigorously whisk together the mascarpone and plain yogurt until smooth. Add the lemon zest and milk. Mix and set aside.
Blend berries: Put the blueberries, lemon juice and simple syrup in a blender. Puree until smooth. You’ll end up with about 1½ cups of puree.
Combine: Immediately pour the blueberry mixture into the milk mixture. If you let it sit, blueberries tend to get thick and lumpy and turn a funny brown color (they’ll still taste okay, but you’ll have to loosen the lumpy batter by stirring and deal with brown-ish blue colored popsicles). If you want a swirly marbled look, mix just a little. Otherwise, mix a lot.
Fill molds: Carefully pour the mixture into your popsicle molds about 1/3 full. Spoon in 1 teaspoon of graham cracker crumbs. Fill another 1/3 of the way with blueberry mix. Add another layer of graham crackers. Fill to the top and finish with a sprinkling of graham crackers. Insert popsicle sticks into the center of each mold and freeze for at least 8 hours.  
Serve: Unmold and serve.
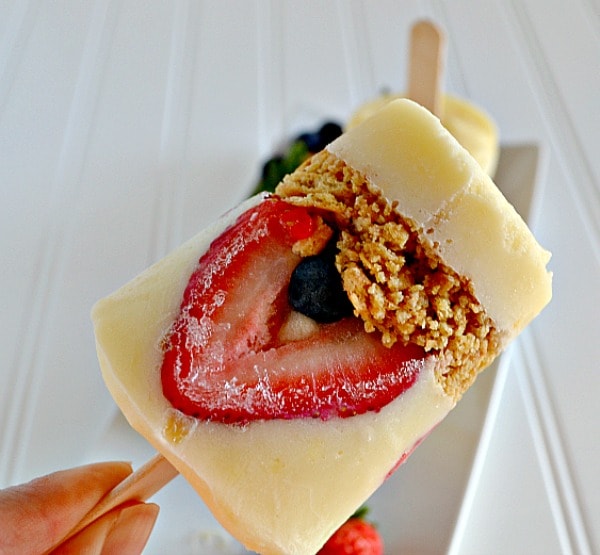
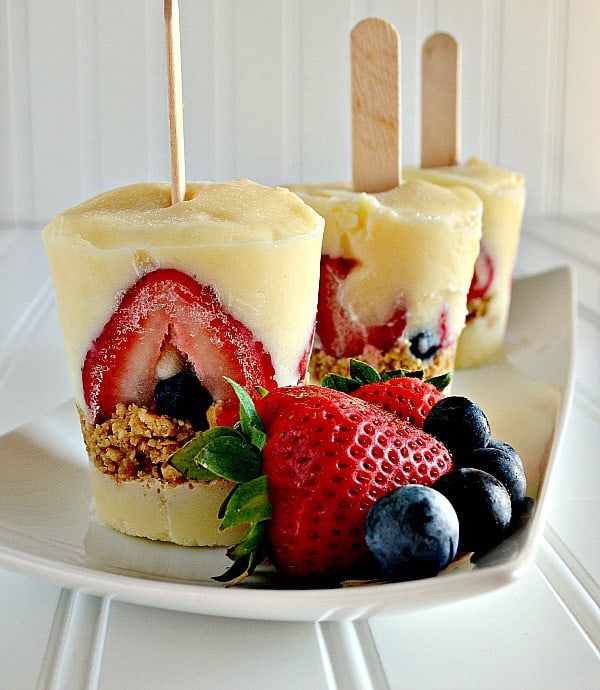
Cheesecake Popsicles


Cheesecake Popsicles
Ingredients
  • (8) 5-ounce Dixie Cups
  • popsicle sticks
  • 8 sheets graham crackers, crushed
  • 2 tablespoons butter, melted
  • 2 (small) packages cheesecake instant pudding mix
  • 4 cups milk
  • sliced strawberries and blueberries
Instructions
  1. Crush your graham crackers into small pieces, using a food processor, blender, rolling pin--whatever you've got!
  2. Stir in melted butter to combine.
  3. Combine pudding mix and milk, whisking together until smooth.
  4. Add a small layer (a spoonful or so) of pudding mix to the bottom of your cups.
  5. Next, add a layer of your graham cracker "crust" (again, about a spoonful).
  6. On top of your graham cracker crumbs, layer in a few sliced berries. Fill cups up the rest of the way with the remaining pudding mix.
  7. Insert popsicle sticks and freeze until set.

Pink and White Striped Yogurt Popsicles: An Easy Valentine's Treats


striped Valentines popsicles Pink and White Striped Yogurt Popsicles: An Easy Valentines Treat
Need a fun, festive, and easy Valentine’s surprise? Striped popsicles are eye-catching, and so easy to make. Since they’re made with antioxidant-rich pomegranate juice, plain organic yogurt, and just a touch of honey, they’re also pretty healthy. I love to serve these up as a fun after school treat, and a quick dessert.
When making my kids’ treats I always try to use the best ingredients, and organic YoBaby yogurt from Stonyfield Farm is a wholesome, creamy yogurt that makes for a great frozen snack.
These popsicles are a great treat for toddlers and kids, but note that babies under 1 year of age should not have honey in any form.
Pink and White Striped Popsicles
makes six 6 oz. popsicles
3 cups pomegranate-cherry juice
1 1/2 cups plain organic yogurt
4 tablespoons honey, divided
In a small sauce pan, gently heat the pomegranate juice over medium-low heat. Dissolve 2 tablespoons honey into the warm liquid.
In a small bowl, dissolve the remaining 2 tablespoons honey into the yogurt.
Pour the prepared juice mixture into 6 popsicle molds or paper cups. Freeze for 45 minutes, or until the first layer is nearly frozen. Next, pour in the yogurt mixture, filling the molds 2/3 of the way up, insert popsicle sticks, and freeze for another 45 minutes. Finally, add the pomegranate mixture to fill the molds completely leaving the sticks in place. Freeze completely, for several hours or more.
To remove popsicles, run the mold under warm water or just peel the paper cup off of the frozen popsicle.

Raspberry Coconut Popsicles: Bring on the Summer


Raspberry coconut popsicles Raspberry Coconut Popsicles: Bring on the Summer!
Just so you know, this is going to be the summer of the popsicle. Don’t get me wrong, I pretty much love every frozen treat, especially ice cream. But light and fruity popsicles have fewer calories and are a breeze to make. With plenty of Dixie cups and popsicle sticks on hand, I’m ready to experiment with a host of refreshing flavors.
My first popsicle triumph is this raspberry coconut number. With real fruit accompanied by naturally sweet coconut milk and honey, this is a homemade treat you can feel great about serving your kids. Or yourself.
Raspberry Coconut Popsicles
makes roughly twenty 3 oz. popsicles
1 cup raspberries (fresh or frozen)
1 cup blueberries (fresh of frozen)
1 14 oz. can coconut milk (full-fat or light)
2 cups water
1 cup apple juice (or any other juice you have on hand)
1/2 cup honey (or more–adjust to taste)
5 oz. Dixie cups
wooden popsicle sticks
Combine all of the ingredients in your blender. Pour mixture into 5 oz. Dixie cups, filling 2/3 of the way. Freeze for 30 minutes, insert sticks, and continue to chill until the popsicles are fully frozen, 2 hours or more. Carefully cut and tear the Dixie cups off of the popsicles, and seal in a plastic bag. Enjoy!

Strawberry Cheesecake Popsicles


strawberry shortcake popsicles Strawberry Shortcake Popsicles: A Surprising Summer Treat
I grew up knowing Strawberry Shortcake more as a character who battled with the Peculiar Purple Pie Man for reasons unclear than as a dessert, but now it’s one of my favorites. When the first real strawberries start to appear in stores and farmer’s markets, my thoughts immediately turn to strawberry shortcake. We’ve been experimenting with popsicles at Brooklyn Supper HQ lately, so with the start of strawberry season, I thought it would be a great time to try this classic dessert in popsicle form. It was a huge success.
The “shortcake” is actually Nilla wafers we had leftover from making banana pudding, crushed and held together with yogurt and honey. The strawberries are actually strawberries, though. The layering makes this a fun dessert for older kids to help with and the results will be adored by kids and grownups alike.

Strawberry Shortcake Popsicles (adapted from Bakers Royale)
makes 12 popsicles
2 cups fresh strawberries, washed and hulled
1/2 cup crushed Nilla wafers
2 cups plain whole milk yogurt
1/3 cup honey (more if desired)
12 6 oz. Dixie cups
wooden popsicle sticks
In a medium bowl, combine the crushed Nilla wafers, yogurt, and honey. Set out 12 6 oz. Dixie cups, and fill each one with 2 tablespoons of the yogurt mixture. Set in the freezer to chill for 30 minutes.
Meanwhile, in a blender or food processor, puree the berries. Divide the berries among the 12 cups, and freeze for another 30 minutes.
Finally, divide the remaining yogurt mixture among the cups, add a popsicle stick to each one, and chill completely, several hours or more.
To serve, simply cut or tear the cup off.

Blueberry Cheesecake Popsicles


blueberry cheesecake popsicles Blueberry Cheesecake Popsicles
A few weeks ago, we shared a recipe for strawberry shortcake popsicles. These tasty little treats were so good and easy to make that I got to thinking, what about cheesecake? I love cheesecake, but it’s labor intensive and pretty high in fat. So I came up with these super easy, tangy, and creamy blueberry cheesecake pops. They’re easy to whip up, and have delicious authentic cheesecake flavor.
Made with real blueberries, a smidge of honey, probiotic yogurt, and low-fat cream cheese, you don’t even have to feel (too) guilty about these frozen treats. And while they’re lighter on calories, these have the tang and creaminess cheesecake is known for.
blueberry cheesecake popsicles2 Blueberry Cheesecake Popsicles
Blueberry Cheesecake Popsicles
makes twelve 4 oz. popsicles
for the cheesecake section
3 cups whole-milk yogurt
3 oz. cream cheese or Neufchatel
3/4 cup crushed graham crackers
1/3 cup honey
2 tablespoons fresh squeezed lemon juice
1 teaspoon vanilla extract
Dice up the cream cheese into small chunks, and whisk into the yogurt until smooth, though a few cream cheese chunks is fine. Add the graham crackers, honey, lemon juice, and vanilla, and stir.

for the blueberry section

2 cups blueberries (frozen or fresh)
3 tablespoons honey
1 tablespoon fresh squeezed lemon juice
In your blender or food processor, puree the blueberries, honey, and lemon juice.
To assemble the popsicles, spoon 3 tablespoons of the yogurt mixture into Dixie cups and freeze for 30 minutes. Then spoon in 3 tablespoons of the blueberry mixture, insert wooden popsicle sticks, and freeze for another 30 minutes. Then add another 3 tablespoons of the yogurt mixture, being careful not to disturb the popsicle stick, and freeze until the popsicles are cured, at least 4 hours, but preferably overnight.