Friday, 11 July 2014

各种不同鸡扒的做法~

香煎什扒

食材
--主料
~鸡腿一根
~排骨两大段
--辅料
~小牛扒一块
~鸡蛋一个
~西兰花两朵 
步骤
1.鸡腿切成不去骨,与其他肉类一起,加入叉烧酱,一点盐,黑胡椒腌一个小时以上。
2.热油锅,先下鸡腿煎,皮朝下,使其出油,再下其他肉类一起慢火煎香,煎熟。
3.热另一油锅,打入鸡蛋,煎成太阳蛋一个,西兰花开水焯熟。一起摆盘即可。

黑椒鸡排

食材
--主料
~鸡腿1只 
--辅料
~洋葱适量
~盐适量
~黑胡椒粉适量
~番茄酱适量
~生抽适量 
步骤
1.鸡腿洗净,去骨,摊平,用刀适当的拍打几下,然后放入容器内,加入盐,黑胡椒粉,生抽腌渍一会。
2.洋葱洗净切碎,要尽量切得碎一些。
3.配菜如西兰花,胡萝卜,土豆等,洗净去皮切块,根据自己的需要要提前煎熟或焯烫。
4.平底锅倒入适量油烧热,放入腌渍好的鸡排,先煎带皮的一面,用小火慢慢的煎至两面金黄,一定要小火哦。
5.鸡排煎熟后取出,切块,跟配菜一起摆盘。锅内留底油,放入洋葱碎不断翻炒,再加入番茄酱,适量清水或是高汤,少许的盐,黑胡椒粉,做成酱汁,最后浇到鸡排上即可。

芝麻鸡排

食材
--主料
~鸡胸肉500g
~鸡蛋1个
--辅料
~芝麻300g
~淀粉25g
~料酒15ml
~胡椒粉3g
~盐5g
~油少许
步骤
1.鸡肉切成片,用刀背拍松,放入鸡蛋一个,淀粉25克,料酒15ML,胡椒粉3克,盐5克腌10分钟
2.裹上芝麻
3.下油锅煎
4.圣女果切一大一小两半
5.小的再划上个口子
6.插在大的上

香煎迷迭香鸡排

食材
--主料
~带骨鸡腿上肉一块
-- 辅料
~白酒迷迭香一小枝
~意大利混合香草(干草)
~茄汁酱油地中海蒜香香草(干草)
~橄榄油
~盐
~砂糖
~胡椒粉
~6号鸡公头意大利面
~番茄
~新鲜柠檬
~罗勒适量
~意大利甜罗勒适量 
步骤
1.鸡腿肉洗干净表面划刀让其腌过程中入味,迷迭香洗干净弄碎备用。
2.鸡腿肉加入少许白酒、盐、橄榄油、迷迭香 1小勺意大利混合香草和地中海蒜香香草少许砂糖、胡椒粉、少许酱油混合搅拌均匀放入冰箱腌1天。
3.鸡腿肉下锅慢火煎熟,配上番茄炒意大利面即可。

香煎鸡排

食材
--主料
~鸡胸肉100g 
--辅料
~油适量
~盐适量
~香蒜
~炸粉适量
~蛋液适量
~面包糠适量 
步骤
1.鸡胸肉横着用刀平切下一块肉,这样做就会得到一块比较薄的鸡肉。
2.用刀背将鸡肉正反面轻轻拍松。
3.将鸡肉铺满香蒜炸粉,腌制10分钟入味。
4.拍些干淀粉在鸡肉上,两边都要沾上。
5.放入蛋液中沾满蛋液。
6.两面沾满面包糠。
7.锅中倒油。
8.小火将鸡排煎至两面金黄。

土娃娃厨房之西餐主菜─蓝带

食材
--主料
~鸡胸肉一块
~培根2片
~鸡蛋一个
~面包糠适量
--辅料
~切达芝士2片 
步骤
鸡胸肉1块,片成2片,用肉锤敲成薄片,放在盐,黑胡椒,淀粉中稍微腌制,铺平,在中间放一片培根,一片切达芝士,然后用鸡肉包起。在鸡蛋液中浸一下,然后在面包糠中沾满,放平底锅煎到2面金黄即可。

Crispy Beer Battered Prawns

Crispy Beer Battered Shrimp
Crispy Beer Battered Prawns, Or of course Shrimp, depending on where you live! What can I say other than these are WONDERFUL!.
The batter has a hint of beer flavour, and is light and crispy crunchy. The prawns are juicy and sweet.... add to that your favourite dipping sauce (although these are so good on their own too!) and this makes for a perfect starter or party food.
Prawns are very expensive where I live,  and so I have used frozen ones, defrosted and cleaned. They were delicious and perfect! Try and choose medium sized prawns, you know, when you curl your index finger, that size!
I hope you will enjoy these as much as I do!
Prep Time: 10 minutes
Cook Time: 3-5 minutes (approx)
Yield: 12
  • Frozen
  •  
  • Party foods ideas
  •  
  • Kitchen Design
  •  
  • Surface Computer
 

INGREDIENTS

  • 1 dozen fresh or frozen prawns, shelled and deveined.
  • 1/2 cup flour, seasoned with salt and pepper (for pre coating)
  • Vegetable Oil for deep frying. (calculate amount according to the size of your pan)
The Batter 
  • 50g or 1/2 cup All Purpose Flour
  • 3/4 Teaspoons baking powder
  • 4 Tablespoons Milk
  • 1/2 Tablespoon Olive oil
  • 1 Tablespoon water
  • Pinch of salt
  • 3 Tablespoons of fizzy lager or beer. (A light beer works best). You can use fizzy water instead of beer.
  • Kitchen Renovation
  •  
  • Shrimping
  •  
  • Shrimp
  •  
  • Roasting
  •  
  • Live
  •  
  • Depend
Instructions
1. If you are using frozen prawns, defrost them. Deshell and devein then pat dry with some kitchen paper.
2. Heat up the oil in your fryer / pan until it reaches 180C / 350F.
3. Mix your flour and salt and pepper well in a shallow dish and cover the prawns with the flour and shaking off any loose flour.
4. Make up the batter. Add all the ingredients EXCEPT the beer / fizzy water, and give it a light whisk. Don't worry if there are lumps in the batter. This is good!

If you don't have a thermometer, drop a bit of batter in and
 and see if it sizzles to the surface.
Crispy Beer Battered Prawns
mix in salt and pepper
Crispy Beer Battered Prawns
batter without the fizz
hot oil
Testing if the oil is hot enough
5. Add the fizzy beer or fizzy water to your batter and gently mix it. It should have the consistency of a pouring cream or yoghurt. If it is too thick, add a little of your fizzy liquid.
6.. Place a few sheets of kitchen paper in your baking tray or plate. We will use this to place the prawns once they're cooked.
batter
Add the fizz to your batter
7. We will cook 4 - 6 prawns at a time, depends on the size of your pan / fryer. Taking the end of each prawn by its tail, , place it in the batter and coat it well. Take it out of the batter and leave the excess to drip off, say for about 5 seconds.
Then gently place it in the hot oil, and cook for 2 - 3  minutes until it becomes crispy and golden brown just like in the photos below. If the batter starts going brown too quickly, turn the temperature down a little.
Place on the kitchen paper then keep warm in the oven, whilst you cook the other prawns (if you are making a large batch) the same way and add to the oven.

Serve on their own or with your favourite dip!
Crispy Beer Battered Prawns
What did you think to our recipe? Did you enjoy it ? We'd love to hear how you liked it. Please tell us in the comments box below!
If you would like to make some of my Best Ever Tartar sauce to go with the prawns, click on the photo below, or any of our other suggestions!

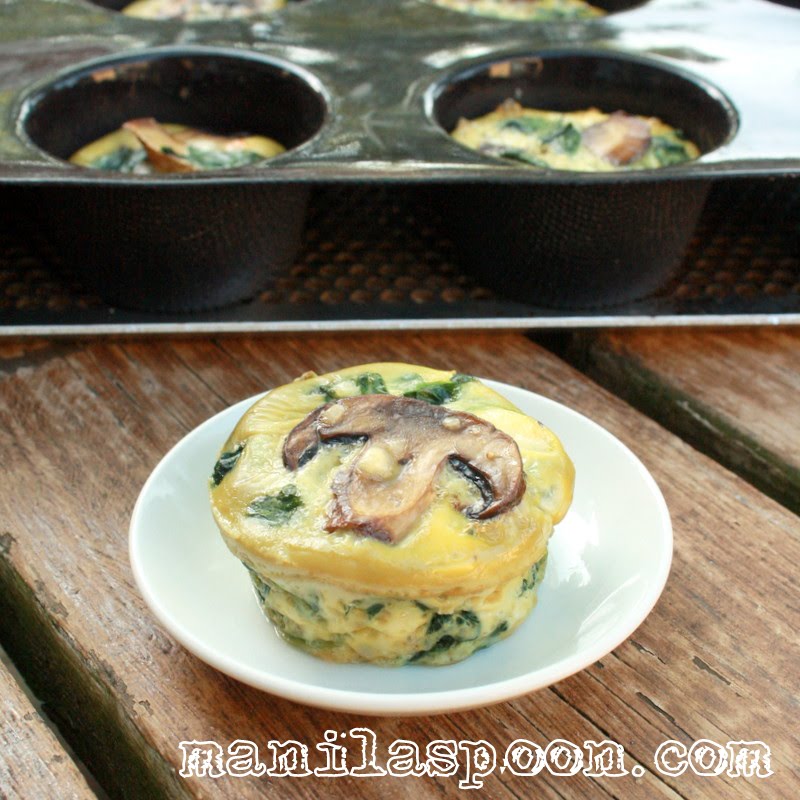
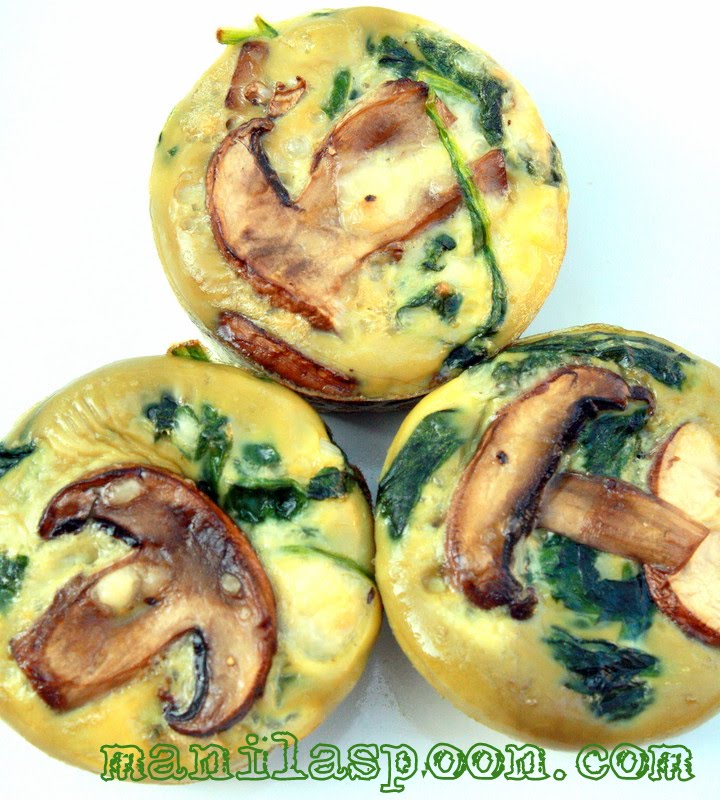
Spinach Quiche Cups


A friend of mine is a distributor of Demarle products (Silpat, Flexipan and Silform non-stick bakeware made of fiberglass and food grade silicone from France). This week she kindly lent me some of her wares so I could try them at home and learn how to use them, or sort of put them to the test.


One of the products I borrowed was her flexi-muffin tray. Since it is supposed to be non-stick, I thought the perfect dish to try would be my crustless spinach quiche cups (inspired by South Beach Diet's Vegetable Quiche Cups), my favorite breakfast treat when I am in the mood for a low-carb and gluten-free diet. I love these mini-quiches but when I bake them without using liners, it can be painful to clean up the pan afterwards. That's despite the claim that they are non-stick and that I even used some oil spray on them. So, I am really looking for a product that I can use for this recipe - one that will truly work and would also provide hassle-free cleaning. 

Wow, I am amazed at the result! One look at the photo above and you can already see that it was an astounding success. Look at these beautiful quiches, how they stand up so well, perfectly shaped, didn't look like half of them were left in the muffin pan (that usually happens before I used this wonderful product). I also tried baking raspberry muffins in the flexi-tray and they came out beautiful as well.

And, because it's truly non-stick I did not use any muffin liners nor did I ever need to grease the pan. How's that for convenience? However, if you don't have this pan, don't fret, either just use muffin liners or grease your muffin pan.
Here's the recipe for the spinach quiche which is truly a healthy low-carb and gluten-free breakfast. Try it!


Ingredients

A little olive oil (for cooking the mushrooms)
1 (10 oz) package fresh spinach (I used the baby ones) --- about 284 grams
4 eggs (if the yolks are quite small I use 5 eggs)
1 cup shredded cheese of your choice (I use mozzarella or the Italian Blend)
1 (8 oz package) mini-bella mushrooms, chopped
1-2 Tbsp, heavy cream or half-and-half (optional)
Salt and Pepper, to taste

*Variation - If you don't fancy mushrooms, try asparagus or bell peppers with the spinach. Also, add some onions to the mix. I add some when I do not use mushrooms.

Procedure

Preheat the oven to 375F or 190C.

Heat a little oil in a large skillet. Saute the mushrooms until they are soft, about 5-6 minutes. Set Aside.


Place the spinach in a deep pan or in the skillet that you used for the mushrooms. Add a little water, 1/4 cup should do it. Using medium heat, cook the spinach just until wilted, about 3-4 mins. Use either your hand or a spatula to pack in the spinach. Drain the excess water really well (especially if you decide to use frozen spinach instead).


In a large mixing bowl, whisk the eggs until combined. Add the cooked mushrooms, spinach, cheeses and cream (if using) to the eggs. Mix well. Season to taste. 
  
Divide evenly among the 12 muffin cups. The muffin tray was slightly bigger than usual so I only filled about 10 cups.


Bake for about 20-23 minutes, or until it's well set and a tester/toothpick inserted in the center comes out clean.


Leave in the pan for a few minutes or just until it's cool enough to handle. It was so easy to remove them from the pan! They practically pop-out! 

Sprinkle with a little more cheese on top, if desired. Mark enjoys them with rice on the side!

If you wish to print the recipe, there's a print-friendly icon at the end of the post. Click on the "remove images box" for easy and convenient printing.


If you like what you see and wish to receive updates on new recipes, feel free to subscribe or join our site or like us on Facebook. Thank you so much for dropping by! Happy eating!

Raspberry Chocolate Chip Muffins


My two tots love muffins so I often make a fruity one for them. I especially love making muffins using fresh and seasonal berries for they surely impart all the fruity goodness in these delicious snacks. The fresh raspberries provide a tangy contrast to sweet chocolate chips making this especially yummy. Of course, when the season turns colder and fresh berries are not readily available frozen raspberries can be substituted.
Because they can be made anytime, these muffins are perfect as snacks to take to school. That way, I also know that when my little boy takes a bite of it, he'll be thinking of Mommy.  :-)


Ingredients 

1/2 cup (1 stick) unsalted Butter
1 cup packed brown sugar 
2 cups all purpose flour*
1 teaspoon baking powder
½ teaspoon baking soda
½ teaspoon salt
2 large eggs
1 cup sour cream
1 teaspoon Vanilla Extract
1 cup Raspberries
1 cup chocolate chips 
1-2 Tablespoons White or Brown Sugar (extra for sprinkling, optional)

*You can replace half of the flour with 1 cup oatmeal for extra fiber, if you prefer.


Procedure 

Preheat the oven to 375F. Line a muffin tin with paper cups.

Melt the butter with the brown sugar in low heat. 

Combine the flour, salt, baking soda and baking powder in a small bowl.

Beat (or whisk) the eggs with the sour cream until combined. Add the Vanilla extract.

Beat the sugar-butter mixture into the sour cream mixture. 

Fold in the flour mixture and then the raspberries and chocolate chips. 

Fill the muffin cups with the mixture dividing the batter equally. Sprinkle generously with sugar (if using). 

Bake in the preheated oven for about 25-28 minutes or until a tester comes out clean.

Cool in the muffin tin for about 5 minutes. Transfer to a wire rack to cool completely. Enjoy!

If you wish to print the recipe, there's a print-friendly icon below the post. Click on the "remove images" box for easy and convenient printing.

If you like what you see and would like to receive new recipe updates we'd love you to subscribe to our posts and join our site. Also do like us in Facebook so you can get the latest updates and so much more. Thanks for visiting and happy browsing!