Friday, 9 November 2012

Basketball Sugar Cookies


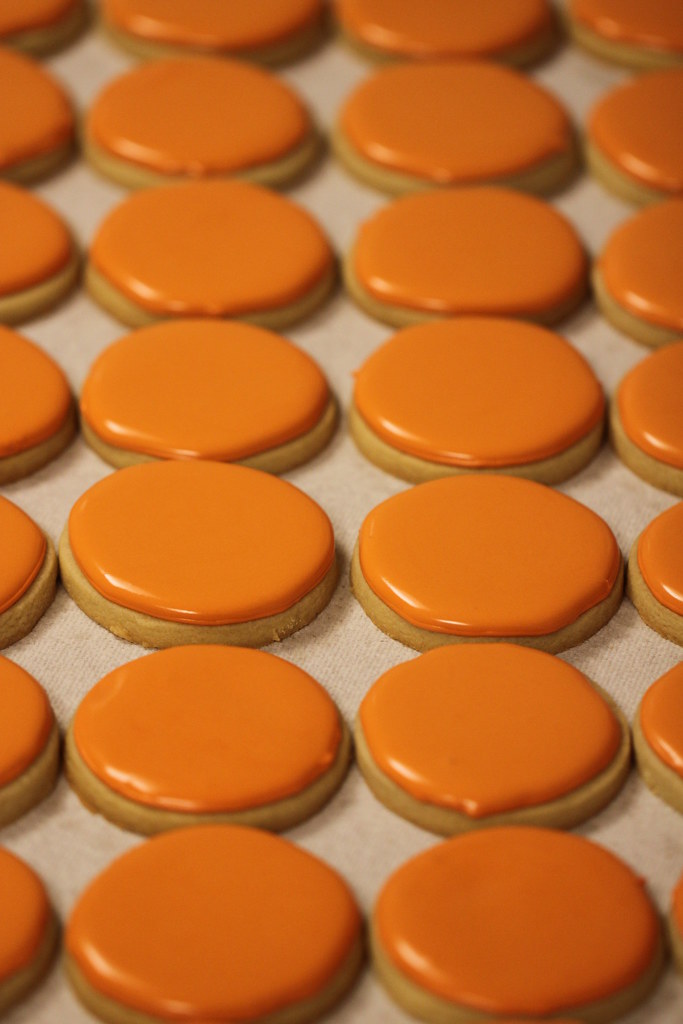
These are some basketball sugar cookies I made for the last game of the season.

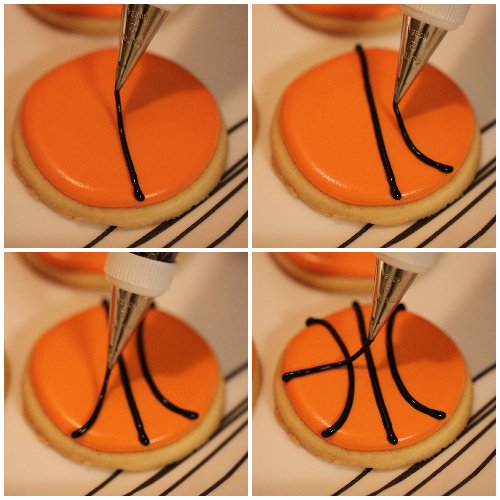
To decorate with this design, start by piping orange piping icing around the border of the cookies with a #2 tip.

Then fill in the centers with with flood-consistency icing.

Let the flooded cookies dry overnight.


Then pipe black lines with piping-consistency icing.

Let the piped cookies dry for several hours, until the icing is hard.


Cookies are dry when they are no longer shiny.

Cookies n’ Cream Fudge

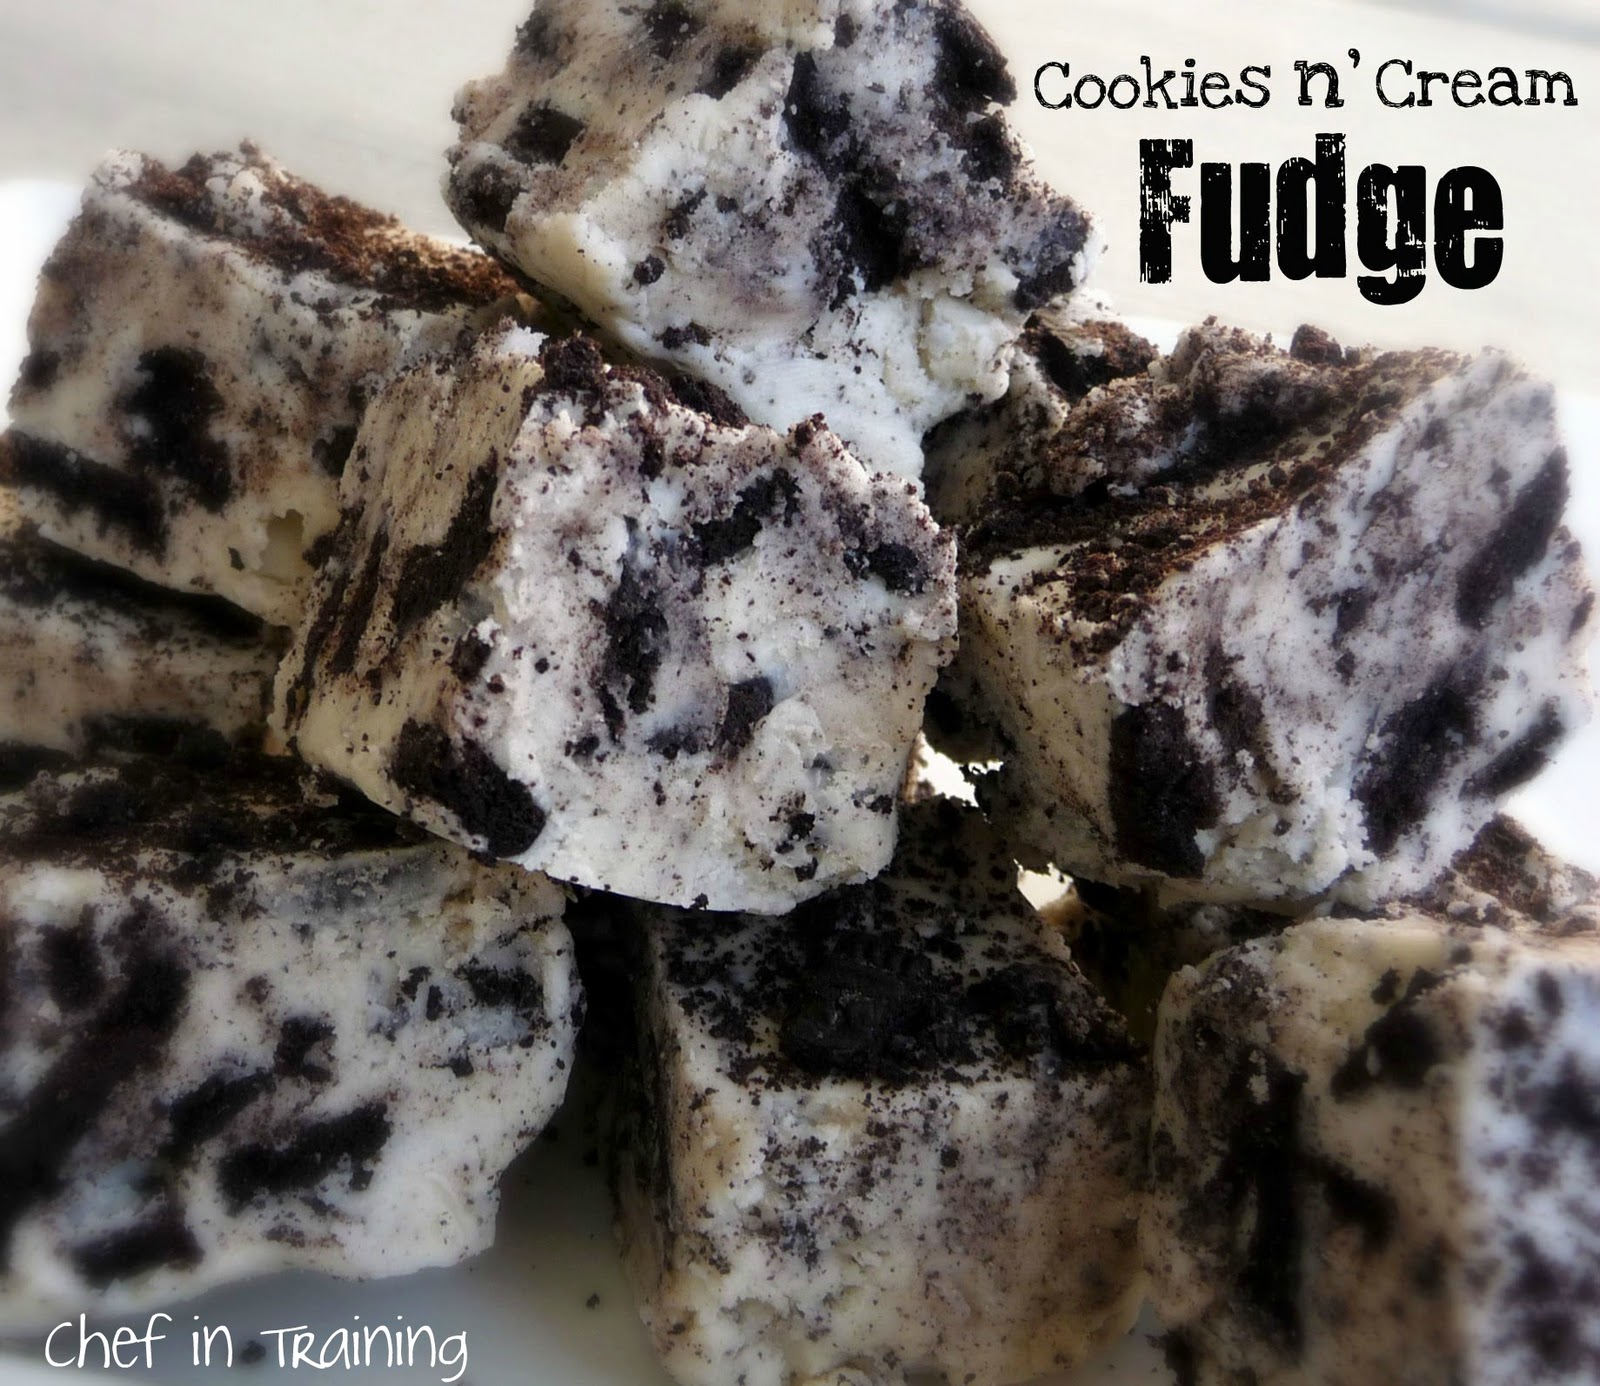
Fudge is one of my favorite Christmas treats.  I know we can make it year round, but the taste of it reminds me of Christmas.  This recipe is a fun variation on traditional fudge.  It also makes for a great neighbor gift!  If you love Oreos and white chocolate, you are going to LOVE this fudge!COOKIES N’ CREAM FUDGErecipe from: My Recipes1 cup sugar3/4 cup butter1 (5 oz.) can evaporated milk2 (12 oz.) packages white chocolate morsels1 (7 oz.) jar marshmallow cream3 cups coarsely chopped Oreos (about 25 cookies), dividedpinch of saltLine a greased 9″ square pan with aluminum foil; set aside.Combine first 3 ingredients in a medium saucepan.  Cook over medium-high heat, stirring constantly, until mixture comes to a boil; cook 3 minutes, stirring constantly.  Remove from heat; add white chocolate morsels, marshmallow cream, 2 cups crushed cookies, and salt.  Stir until morsels melt.Pour fudge into prepared pan.  Sprinkle remaining 1 cup cookies over fudge, gently pressing cookies into fudge.  Cover and chill until firm.Lift uncut fudge in aluminum foil from pan; remove foil and cut fudge into squares.Enjoy!Linking up to these parties and here

Quote: http://www.chef-in-training.com/2011/12/cookies-n-cream-fudge/

2-Ingredient Oreo Bark

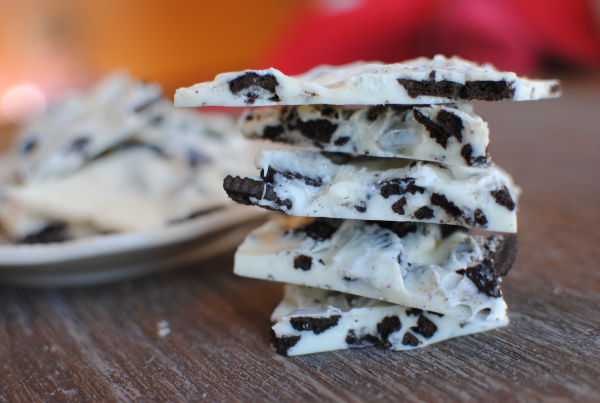
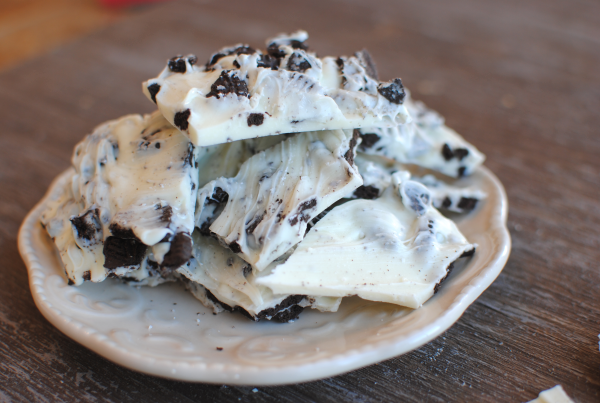
Oreo Bark 1 2 Ingredient Oreo Bark
How did your family do with the time change? Everyone enjoy their extra hour of sleep at your place? With 2 girls under 5, there was no extra hour of sleep here. They just don’t cherish that hour like we do. I even had a conversation with my 5 year old the other night about how mommy and daddy like sleep. She just couldn’t grasp why we would enjoy wasting so much time with our eyes closed. That whole conversation was a lost cause. It never really went anywhere and contained no resolution for her.
Sometimes it’s better to just not try and explain things to a 5 year old, huh?
Last week, I had a hankering for something Oreo. I can’t ever bring myself to actually indulge in eating oreos, but I do like to make things containing them. Go figure. I had a package of white chocolate chips in the pantry and some individual packages of Oreos.
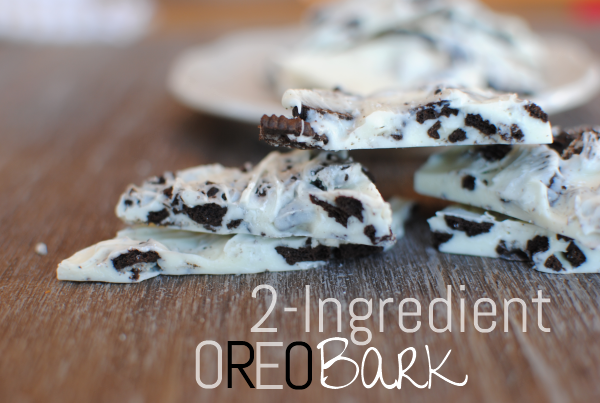
Can you say simple? That’s all that I needed to make this incredibly tasty candy bark. It took literally minutes to make and satisfied my Oreo hankering times 2.
Oreo Bark 3 2 Ingredient Oreo Bark
I found myself eating so much of it that I sent it to work with the hubby. That’s my secret weapon, y’all. You notice sometimes I don’t always make “healthy” things. Those are usually the ones that I try to send away to a friend or to work with hubby.
It all starts with a cookie sheet covered in wax paper. Crumble up about 12 or so Oreos and lay them around the cookie sheet. Melt up your white chocolate chips and pour them over the Oreos. Smooth out and place in the freezer for about 10 minutes or so and YOU’RE DONE.
Does it get any easier?
Oreo Bark 2 2 Ingredient Oreo Bark
This, my friends, would make a fantastic food gift for Christmas! Simple wrap it up in a fancy tin or treat bag and tie with a Christmas bow and you have one cheap and cheerful gift!
Who wouldn’t enjoy Oreo Bark?
2-Ingredient Oreo Bark
Print
Recipe type: Dessert, Snack
Author: Pennywise Cook
With only 2 simple ingredients, you can make a Christmas gift or tasty snack within minutes!
Ingredients
  • 12 or so Oreos (Crumbled)
  • 1 (12 oz) Package White Chocolate Chips
Instructions
  1. Line a cookie sheet with wax paper. Spread the crumbled Oreos around the sheet.
  2. Melt entire bag of white chocolate chips according to the package or in a double boiler.
  3. Once melted pour over the Oreo pieces and smooth out. Place cookie sheet in freezer for about 10 minutes and then break into pieces.
Notes
If you don’t have a double boiler to melt your chocolate chips, just use two sauce pans. Place hot water in the bottom one and the chocolate chips in the top. Bring the water to a rolling boil and melt the chips.

Chewy No-Bake Cookies & Cream Treats


Things I don't understand:

Macarons. Cake pops. Cake in a jar. We get it. You're fancy. 

Nutella. What is the deal. I remember eating this as a kid and thinking score, chocolate on my toast! Chocolate for breakfast! Chocolate in my face!  But people go kind of crazy for this stuff, no? I don't know. Team Peanut Butter.

Red velvet cake. I feel like I'm going to get radioactive superpowers from all that food dye.

Fondant. I don't like you.

Gnocchi. Quinoa. Dulce de leche. Mascarpone. What are you. I can't even pronounce you.

Brownies. Can I throwdown? I don't like brownies. I mean, if you held me down and shoved a warm, chocolatey brownie into my face, I wouldn't punch you in the kneecaps, but they're just kind of boring and square and dense. Like they tried to be cake and failed. Chocolatey bricks. I just can't get behind this. Put some rocky road on that.  

Things I do understand

Marshmallows. 

Oreos.

Butter.
These are similar to the chocolate chip cookie treats I made last month, except these use a whole package of crumbled Oreo cookies instead of chocolate chip! The chocolate chip cookie treats are still my favorite... but then I've always preferred them to Oreos. 
These... let me tell you. These taste like a chewy, cookie-y, Oreo marshmallow Rice Krispie Treat. So. Good. Addictive really. And dangerous. 3 ingredients, 15 minutes, and this no-bake dessert can be in your face. Don't you just love summer? 

I know. I didn't mix them enough. They should actually be black, like an Oreo, not gray, like a slab of concrete. Don't be like me.
Chewy No-Bake Cookies & Cream Bars

Printable Recipe

1 (16-ounce) package of Oreo cookies
5 cups (1 bag) of large marshmallows
4 tablespoons butter

Line an 8x8-inch baking dish with aluminum foil, allowing the foil to hang over the edges, and set aside.

Place Oreo cookies in food processor (or crush in a large Ziploc bag with a rolling pin) and pulse until crumbly, but not ground.

Melt marshmallows and butter in a large microwave-safe bowl until puffy, about 1 1/2 to 2 minutes. Remove and pour in ground cookies. Quickly stir to combine, then transfer to baking dish. 

Allow to set for 10 to 15 minutes. Remove bars from pan by foil edges. Cut, serve, and enjoy!
Wednesday, 12 September 2012

Raspberry Brownies Ice Cream Cake


Ingredients:
1 litre vanilla ice-cream, softened
150g frozen raspberries
125g butter, chopped coarsely
200g dark eating chocolate, chopped coarsely
1/2 cup (110g) caster sugar
2 eggs
1 1/4 cup (185g) plain flour
150g milk eating chocolate, chopped coarsely
1 tablespoon icing sugar

Method:
-Line deep 23cm-round cake pan with plastic wrap, extending wrap so it will cover pan. Combine ice-cream and raspberries in medium bowl. Spoon ice-cream into pan; smooth surface. Fold plastic wrap over to enclose. Freeze 3 hours or until firm.
-Preheat oven to 160 0r 140 fan-forced. Remove ice-cream from pan, still wrapped in plastic; place on tray. Return to freezer.
-Grease same pan; line base and side with baking powder.
-Combine butter, dark chocolate and sugar in medium saucepan; stir over low heat until smooth. Cool 10 minutes.
-Stir in eggs, sifted flour and milk chocolate. Spread mixture into pan. Bake brownie about 30 minutes; cool in pan.
-Split brownie in half. Sandwich ice-cream cake between brownie slices; serve immediately, dusted with sifted icing sugar. Serve with fresh raspberries if you like.

Saturday, 1 September 2012

Fried Tang Hoon

I love this dish since I knew my husband yore ago. His mom, now my MIL, fries lovely tang hoon! I remembered she will dish this up at every festive get-together, and each time, I have to force myself to stop scooping more; politely and diplomatically declining any top-ups. (Come on, I was only girlfriend then, can't be 'showing my capacity' right?!)

I love the crunchiness, the taste, the aroma. It was always very very nice. I like this better than fried noodles or fried mee hoon for that matter. It was just totally different.

Well, its been 10 years now (at least), and I only just managed to give it a try myself. I'm so proud of myself! I made it! I did it!!!

This time, I also serve it with fried shallots. Woooooo, am I in love with myself!? It tasted just like the real thing.


Man was, of course, diplomatic. "Hmmm,... very nice..." were his only words. To know if he really truly likes it? See if he finishes it. AND HE DID!

Wahahahahahahahaha... Top of the world really. 


Here's what you'd need:

* Dried Tang Hoon (aka glass vermicelli, soaked for at least 30mins in cool tap water to soften)
* Green leafy vegetables (I used Xiao Bai Cai)
* Pork fillet (sliced thin. seasoned)
* Garlic 
* Salt & Pepper to taste)
* Soup Stock (I used some Dark Soy Sauce Pork gravy) 


This is what I did:

1. In a wok, fry garlic till fragrant.

2. Add in pork fillet and fry till almost cooked. Add in vegetables and fry.

3. Add in stock, and simmer slightly. (Ensure you have ample stock coz tang hoon will soak it all up)

4. Add in softened tang hoon and with a chopsticks, quickly and gently loosen it by stirring continually. Allow the tang hoon to soak up the stock, add more stock if required. (Important to keep stirring).

5. Add salt and pepper to taste.

6. Dish up in a casserole and cover (I find the heat from within gives the glass vermicelli its glossy and crunchy feel).

7. Serve with chopped chili padi and fried shallot. 


Stir Fried Tang Hoon (Glass Noodle) with Ground Pork


I out did myself as this plate of fried tang hoon (glass noodle) was so delicious!  I added my secret ingredient, minced anchovies just to test how it would turn out.  The glass noodle was not broken into pieces and the bean sprout was crunchy and everything just came so well together.  I used chives because I saw a Chinese cooking show which said chives was really good for our body as it had the ability to clean the poison out of your body system. Listening to that I was sold, we needed to eat more chives from now on.  Chives seem to be very easy to plant here during summer.  Guess I will have more chives recipes coming out too.

My plate of fried glass noodle with ground pork!  Another secret ingredients is the fried eggs, you got to have eggs in this to bring out the overall flavor.  The glass noodle I used for this stir-fry is called Special Grade Bean Thread from China.  It has two red dragons on the cover.  I added it here so that next time I would know which brand to get for stir-fry, if my memory served me right, this brand is not expansive.

I'm sharing this noodle with Presto Pasta Nights, an event created by Ruth from Once Upon a Feast This week host is Cynthia, The Kitchen Slave! Check out her delicious round up on April, 23rd!


Ingredients:

  • 1 package of glass noodle (250gm), soften in tap water.
  • 1 bowl of bean sprouts, washed
  • 1 small carrot, julienne
  • 6 stalks of chives, cut into 1 inch length
  • 1/4 cup of dried anchovies, rinsed and minced
  • 3-4 cloves of garlic, minced
  • 1/2 lb. of ground pork
  • 2 large eggs, beaten

Sauce:
  • Soy sauce (Kikkoman)
  • Sweet dark soy sauce (ABC brand)
  • Salt
  • Sugar
  • Sesame oil (Kadoya)
  • White pepper

Method:

1.  Heat up a wok, when heated, add in oil.  When hot, add in half of the minced anchovies and garlic, stir-fry until fragrant.  Add in ground pork and stir-fry for a while.  Add in carrot and chives and stir-fry until pork is cooked.  Dish out and place on a plate, set aside.

2.  In the same wok, heat up some oil.  When heated, add in the rest of the minced anchovies and garlic.  Stir-fry until fragrant, add in beaten eggs.  Stir-fry and add in soften glass noodle with a little water.  Use a chopstick to mix well.

3.  Add in 1 and sauce, stir-fry until well blended.  Lastly add in bean sprouts, give it a few quick stir and adjust sauce to taste.  Serve hot.